
"Shellac French Manicure!?!" I would usually exclaim in horror when one of my friends ask me to do their nails. "Can you pick something easier?" ... I find french nails scary but please read more to see if I succeeded or not ;) Included in this post is the "step by step" on how I did this french mani using the soak-off gel polish starter kit and LED lamp from FingerPaints ;) Please read on and don't forget to leave me a message (lol).
Yes, French Manicure in soak-off gel had always been daunting to me. My mind goes through the time involved, the fine white lines, 10 very, very... very short finger nails.... and the oozing gel polish. I though that gel is more fluidy, {if that's even a word} than regular polish. At least with regular polish I could use a sticker guide, like I always do. Can't imagine how I could do that with gel when you need to cure under a LED light every step of the way!
My hands were trembling as I picked up my tools and worked on my friend's nails for the first time. It's her first time with polish, any kind of polish. She wants something more demure, subtle but pretty... "French!" Of course... I dearly love her so I would climb mountains for her. French nails isn't exactly the Himalayas, right? So I tried... After much trembling and fuzzing, I was able to achieve a satisfactory gel french nails for her. My confidence grew. In the above picture you see my third set of gel french nails. Yay! It helped that my third friend's nails are longer, with a nice free-edge for a french. I am getting better at it {relatively so ;) }... not so daunting anymore!
Here is a photo of the soak-off gel polishes that I used for my friend's french manicure.
*Fingerpaints "Stay True to the Art"
*Fingerpaints "Impressionist Pink"
.JPG "French Nails | Pretty Nails And Tea")
Check out my second set of french nails. :) French is really timeless and lovely.
It makes short nails appear longer, the nails look elegant and clean. I just love it!
Here are the materials that I used. Please check below for how I did it.
.JPG "French Nails | Pretty Nails And Tea") |
| The Starter Kit (Box) was a gift from my dear friend (second set of French Nails above). It includes: 1. Gel Polish Cleanser, 2. Tip Bonder, 3. Base Coat, 4. Top Coat, 5. Cuticle Oil, 6. Acetone She also gave me the LED light with... it was sold separately... Along with the 7. white and 8. pink soak-off gel polishes. |
Procedure:
1. Nail Preparation
The nails had to be cleaned with the cleanser using a lint free pad. Edges are shaped using a medium grit (16) file. If cuticles need to be pushed and trimmed, do so without using additional chemicals nor liquids. I call it the "dry cleaning," lol. I use (11). Cuticle pusher and cleaner tool to do this. A wooden (17) orange stick is also great, though I use this mainly during the removal of gel polish. A (14) cuticle trimmer can be used to cut excess/protruding cuticle or dry skin.
Gently and lightly buff (15) nails crosswise to remove shine. Wipe with lint free cotton soaked in cleanser to ensure no nail-dust remain. Check for lint as well, just in case. Any lint could be annoying during the application process.
2. Gel Application
b. Apply (4) Base Coat to 4 nails (pinky to index finger) and cure under the LED light for 30 seconds. The LED light turns off automatically after 30 seconds.
While that is curing, work on the other hand's 4 fingers (pinky to index finger), cure. Once done, apply basecoat to both thumbs and cure together.
c. French Manicure
c.1 Wipe nails with cleanser (1) using lint free pads.
c.2 Apply white soak-off gel polish (7) to tips using a patting motion (gently pat and slide the tip of the brush to the end of the nails. Don't worry about the smile line at this point.
c.3 Dip the eyeliner brush (13) in cleanser, the tap brush on paper towel to remove excess liquid. Use this to define the shape of the smile line. Place brush on one side of the nail and slide in a curve towards the other side. If more refinement is needed, place the brush perpendicular to the tip and slowly slide towards the french tip. {Wow, sounds complicated written but it is actually not that hard. The hands need to be steady though.}
c.4 Do this first to the 4 fingers (pinky to index finger), cure. Repeat process to the other hand, cure... Then work on the thumbs last. Cure each time for 30 seconds.

c.6 To soften the look of the white tips, I applied one coat of "Impressionist Pink," a light, shimmery pink polish over the entire nail. Don't forget to cure every after application of gel ;)
c.7 At this point, designs can be done. If doing design, wipe nails with cleanser first. Then, I used a dotting tool, regular white polish and a silver glitter to make a simple flower on the ring finger ;) Let dry for at least 2 minutes.
c.8 Ensure that the flower design is dry then apply top coat. Cure.
c.9 Wipe the nails with cleanser.
c.10 Finally, apply cuticle oil all around the nails and lightly massage. :) All done!
TIP: Clean around the nails and the cuticle each time before curing. After the gel cures, it will harden and clean-up would be really, really difficult! Not to mention, when there are hardened polish around the nail, it will allow for water to sip through the polish and cause lifting.
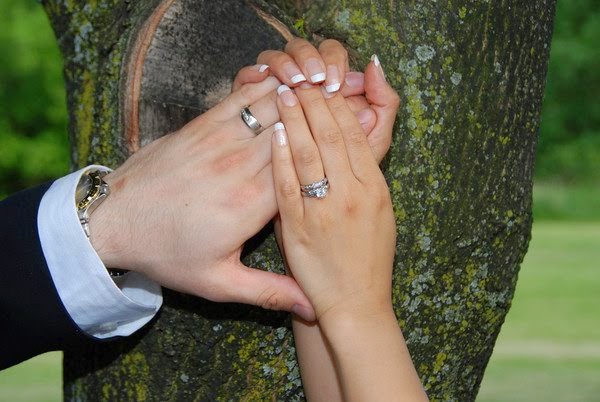 Confession time: I did this three times already to my friends and have not done it to myself yet. I mean, I have done french on my fingers before (my wedding) but with regular polish. See here. I have not tried soak-off gel on my fingers yet. I will try soon and I will let you know ;) For now, I am proud that I was able to conquer my fear of doing french manicure for my friends using gel.
 Please let me know if you find this helpful still.
xoxo, Maya
Related Post: Fingerpaints Gel Polish and LED Lamp

No comments:
Post a Comment
Thank you very much for leaving me a message.
"Like apples of gold in silver carvings, is a word spoken at the right time." ~ Proverbs 25:11.